I recently had to bring across an existing SharePoint 2010 Foundation site collection that was being used into a new environment I was building for the client. As often is the case, a previous IT admin installed SharePoint on a standalone server, using one account, doing the infamous "next, next, next" approach to installing SharePoint and then gave it to the business to use. In this case, the site had grown organically with a huge hierarchy of folders.
Ideally we would have looked at migrating this content into the new IA using content types. metadata, etc, but as it was only discovered after the fact ( don't you love that! ) the decision was made just to bring it over so the existing hardware could be re-purposed.
The first thing to do is to go to the central admin > application management > Site Collections > View All Site Collections.
![]()
From here you can see the database that is being used.
The next thing to do is to copy the database files from the old SQL server to the new SQL server and attach them. Be sure to give your farm account and web application account DBowner permissions on the database once attached to ensure it can connect to it and write to it.
Next create a new web application to house the site collection you are migrating.
This is done by going to Central Admin > Manage web applications then clicking on New.
![]()
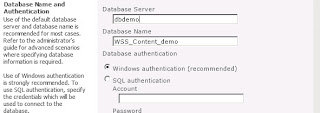
Create the web app as you normally would on the address you would like it accessed, but in this case give the database a name you will remember as you will be deleting it soon.
![]()
Once this has been done your new web application will have been created. From here navigate to
Central Admin > Manage Content Databases and select the web application you just created from the right hand drop down. Then click on "Add a Content Database"
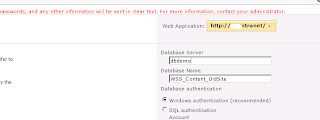
![]() Type in the name of the database that you attached to the new SharePoint SQL server then hit OK.
Type in the name of the database that you attached to the new SharePoint SQL server then hit OK.
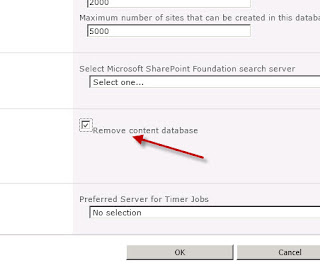
Once this is done you will see the existing WSS_Content_Demo database and the new one you just attached. Click on the WSS_Content_Demo database ( or whatever you called it when you created it ).
Click on "remove content database"
![]()
And that is it! You should now be able to access the site on the URL you set up when creating the host header for the web application.
NOTE: One thing to be mindful of is that when SharePoint has been installed as I found it, there have been no updates applied, and as you are a pro and have slipstreamed the install of the new SharePoint environment with all the upgrades, you will likely find that the content database you attached is not up to date. ( This is often visible when you access the Central Admin Review problems and Solutions reports.
To fix this,do the following: ( From TechNet )
1. Open an Administrative command prompt.
2. Change directory to C:\Program Files\Common Files\Microsoft Shared\Web Server Extensions\14\BIN
3. Run PSConfig.exe -cmd upgrade -inplace b2b -force -cmd applicationcontent -install -cmd installfeatures
If the health report from the farm does not show the upgrade as taking place and the alert being removed, do an IISRESET and this should fix the problem.
Ideally we would have looked at migrating this content into the new IA using content types. metadata, etc, but as it was only discovered after the fact ( don't you love that! ) the decision was made just to bring it over so the existing hardware could be re-purposed.
The first thing to do is to go to the central admin > application management > Site Collections > View All Site Collections.
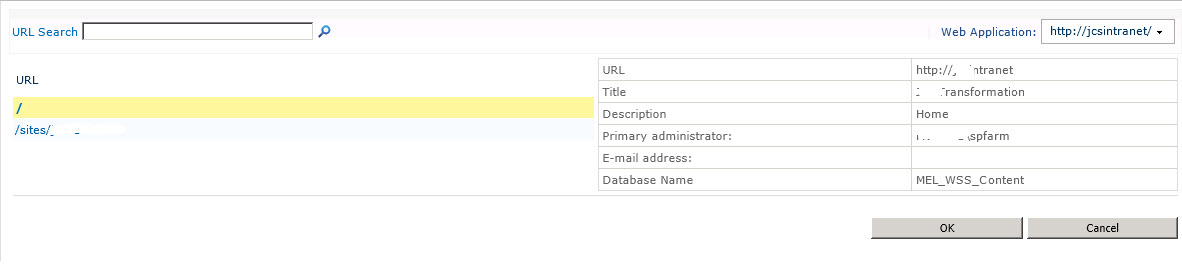
From here you can see the database that is being used.
The next thing to do is to copy the database files from the old SQL server to the new SQL server and attach them. Be sure to give your farm account and web application account DBowner permissions on the database once attached to ensure it can connect to it and write to it.
Next create a new web application to house the site collection you are migrating.
This is done by going to Central Admin > Manage web applications then clicking on New.

Create the web app as you normally would on the address you would like it accessed, but in this case give the database a name you will remember as you will be deleting it soon.
Once this has been done your new web application will have been created. From here navigate to
Central Admin > Manage Content Databases and select the web application you just created from the right hand drop down. Then click on "Add a Content Database"
Once this is done you will see the existing WSS_Content_Demo database and the new one you just attached. Click on the WSS_Content_Demo database ( or whatever you called it when you created it ).
Click on "remove content database"
And that is it! You should now be able to access the site on the URL you set up when creating the host header for the web application.
NOTE: One thing to be mindful of is that when SharePoint has been installed as I found it, there have been no updates applied, and as you are a pro and have slipstreamed the install of the new SharePoint environment with all the upgrades, you will likely find that the content database you attached is not up to date. ( This is often visible when you access the Central Admin Review problems and Solutions reports.
To fix this,do the following: ( From TechNet )
1. Open an Administrative command prompt.
2. Change directory to C:\Program Files\Common Files\Microsoft Shared\Web Server Extensions\14\BIN
3. Run PSConfig.exe -cmd upgrade -inplace b2b -force -cmd applicationcontent -install -cmd installfeatures
If the health report from the farm does not show the upgrade as taking place and the alert being removed, do an IISRESET and this should fix the problem.